Welcome to the Euro Pro Sewing Machine Instruction Manual, your comprehensive guide to mastering your sewing machine. This manual covers setup, threading, maintenance, and troubleshooting for various Euro Pro models.
Whether you’re a beginner or an experienced sewer, this guide ensures optimal performance and safety. Explore features, stitch options, and tips to enhance your sewing experience with Euro Pro machines.
1.1 Overview of the Euro Pro Sewing Machine Models
Euro Pro offers a range of sewing machines designed for versatility and durability. Models like the EuroPro 425WC, 7500, and 473C cater to various sewing needs, from basic repairs to heavy-duty projects. These machines often feature multiple stitch patterns, automatic threading, and durable construction. Some models specialize in handling thick fabrics like denim or delicate materials like silk, making them ideal for diverse sewing tasks.
1.2 Importance of Reading the Instruction Manual
Reading the Euro Pro sewing machine instruction manual is essential for safe operation and optimal performance. It provides detailed guides for threading, tension adjustment, and troubleshooting common issues like thread breakage or jammed stitches. Understanding the manual ensures proper use of built-in stitch patterns and special presser feet, maximizing your sewing experience.
The manual also offers maintenance tips to prolong machine longevity and instructions for handling various fabrics, from delicate silk to heavy denim. By following the guidelines, you can avoid costly repairs and ensure consistent, high-quality stitching in all your projects.
Safety Precautions and Machine Setup
Safety is crucial when setting up your Euro Pro sewing machine. Always follow precautions to avoid accidents, ensuring the machine is placed on a stable surface and properly powered.
2.1 Unpacking and Initial Inspection
Upon unpacking your Euro Pro sewing machine, inspect for any damage or missing parts. Ensure all accessories, such as the power cord, presser feet, and needles, are included. Carefully remove packaging materials and verify the machine’s condition. Check for loose components and ensure the sewing machine is clean and ready for setup. This step ensures a smooth and safe initial operation.
2.2 Placing the Machine on a Stable Surface
Position your Euro Pro sewing machine on a sturdy, flat surface, ensuring stability to prevent vibration or movement during use. Avoid uneven or soft surfaces, as this could affect stitching quality. Ensure the area is clear of clutter and well-lit for optimal visibility. Proper placement enhances sewing accuracy and reduces the risk of machine damage or operational issues.
2.3 Essential Safety Guidelines
Always unplug the machine when not in use or during maintenance. Keep the machine out of children’s reach and avoid wearing loose clothing that could get caught. Ensure the work area is well-ventilated and free from flammable materials. Use the correct power source and avoid overloading the machine. Never touch electrical parts with wet hands. Follow all safety precautions to ensure safe and efficient operation.
Threading and Tension Guide
Proper threading and tension adjustments are crucial for smooth stitching. Follow the step-by-step guide to ensure your machine operates efficiently and delivers professional-quality results consistently.
3.1 Step-by-Step Threading Process
Start by placing the thread on the spool pin. Guide the thread through the take-up lever, ensuring it clicks into place. Pass it through the tension discs, adjusting as needed. Bring the thread down to the needle, leaving a small loop. Insert the thread through the needle’s eye from front to back. Pull gently to secure. Refer to diagrams for precise alignment and tension adjustment.
3.2 Adjusting Thread Tension for Optimal Stitching
To achieve perfect stitches, adjust the thread tension by turning the dials on the machine. Loosen or tighten the upper thread tension by rotating the dial, ensuring even stitching. Check the lower thread tension by lifting the bobbin case and adjusting as needed. Test stitches on scrap fabric to ensure balance. Refer to diagrams for precise tension settings and troubleshooting guidance. Proper tension prevents fabric puckering or loose stitching.
Maintenance and Cleaning Tips
Regularly clean and oil your Euro Pro sewing machine to ensure smooth operation. Use a soft brush to remove lint and thread fragments from the looper area. Refer to your manual for specific cleaning instructions to maintain performance and longevity.
4.1 Regular Maintenance for Longevity
Regular maintenance is crucial for extending the life of your Euro Pro sewing machine. Dust and lint accumulation can hinder performance, so clean the bobbin area and feed dogs frequently. Lubricate moving parts as recommended in the manual to ensure smooth operation. Additionally, check and replace needles regularly to prevent damage and maintain consistent stitching quality.
4.2 Cleaning the Machine and Accessories
Regular cleaning is essential to keep your Euro Pro sewing machine functioning smoothly. Use a soft brush to remove dust and lint from the bobbin area, tension discs, and feed dogs. Avoid harsh chemicals; instead, use a slightly damp cloth for exterior cleaning. For stubborn residue, a small amount of oil can be applied to moving parts. Always clean accessories like presser feet and needles to prevent thread buildup and ensure precise stitching.
For thorough maintenance, periodically inspect and clean the machine’s interior. Use compressed air to gently remove debris from tight spaces. Keep the sewing area dust-free to prevent contamination. Following these steps ensures your Euro Pro sewing machine remains in optimal condition for years of reliable service.
Understanding Machine Parts and Accessories
Familiarize yourself with the Euro Pro sewing machine’s key components, such as the bobbin, presser foot, and tension controls. Accessories like additional presser feet and needles enhance versatility for various fabrics and stitching techniques.
5.1 Identifying Key Components of the Euro Pro Sewing Machine
The Euro Pro sewing machine features essential components like the bobbin, presser foot, and tension controls. The spool pin holds the thread, while the stitch selector allows pattern choices. The power switch and foot pedal control operation. Understanding these parts ensures proper usage and troubleshooting. Familiarize yourself with the needle, feed dogs, and reverse stitch lever for optimal sewing performance.
5.2 Accessories Included with the Machine
Your Euro Pro sewing machine comes with essential accessories to enhance your sewing experience. These include assorted presser feet for different fabrics, extra bobbins, and a variety of needles. Additional items like a sewing notions kit and a hardcover or dust cover are often provided to protect and maintain your machine. These accessories help you tackle various sewing projects with ease and precision.
Troubleshooting Common Issues
This section helps resolve issues like thread breakage and needle problems, ensuring smooth sewing operations with quick fixes and optimal machine performance.
6.1 Resolving Thread Breakage and Tension Problems
Thread breakage and tension issues are common challenges. Always check the spool cap alignment and ensure the thread is properly seated in the tension discs. Adjust the bobbin tension if loose or tight, as this can cause uneven stitching. For persistent issues, consult the manual or contact a professional for assistance. Proper threading techniques and regular maintenance can prevent such problems.
Use high-quality threads and needles suitable for your fabric type. Avoid over-tightening, as this can damage the machine or thread. Refer to the troubleshooting section for step-by-step solutions to restore optimal stitching performance.
6.2 Fixing Jammed Stitches or Needle Issues
If stitches are jammed, turn off the machine and gently remove the fabric. Check for tangled threads or debris in the bobbin area. Ensure the needle is properly installed and aligned. For needle breakage, stop sewing immediately and replace the needle with a compatible one. Always refer to the manual for specific guidance on handling needle issues safely and effectively.
Regularly clean the machine to prevent dust buildup, which can cause jams. Use the correct needle type for your fabric to avoid damage. If the problem persists, consult a professional or contact Euro Pro support for assistance.
Advanced Features and Stitch Options
Discover the versatility of Euro Pro sewing machines with their extensive range of built-in stitch patterns and customizable options, utilizing specialized presser feet for intricate fabric handling.
Easily customize stitch length, width, and tension for precise results on varying fabrics. Explore advanced features like automatic threading and speed control for enhanced sewing efficiency.
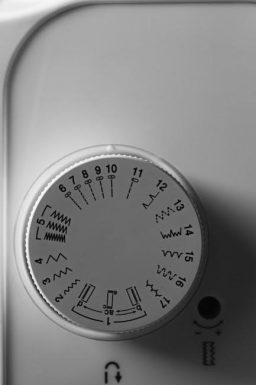
7.1 Exploring Built-In Stitch Patterns
The Euro Pro sewing machine offers a wide variety of built-in stitch patterns, from basic straight and zigzag stitches to decorative and specialized options for embroidery or heavy-duty fabrics.
Users can customize stitch length and width, ensuring precise results for different materials. This feature enhances versatility, allowing sewers to tackle projects ranging from delicate silk to durable denim with ease and accuracy.
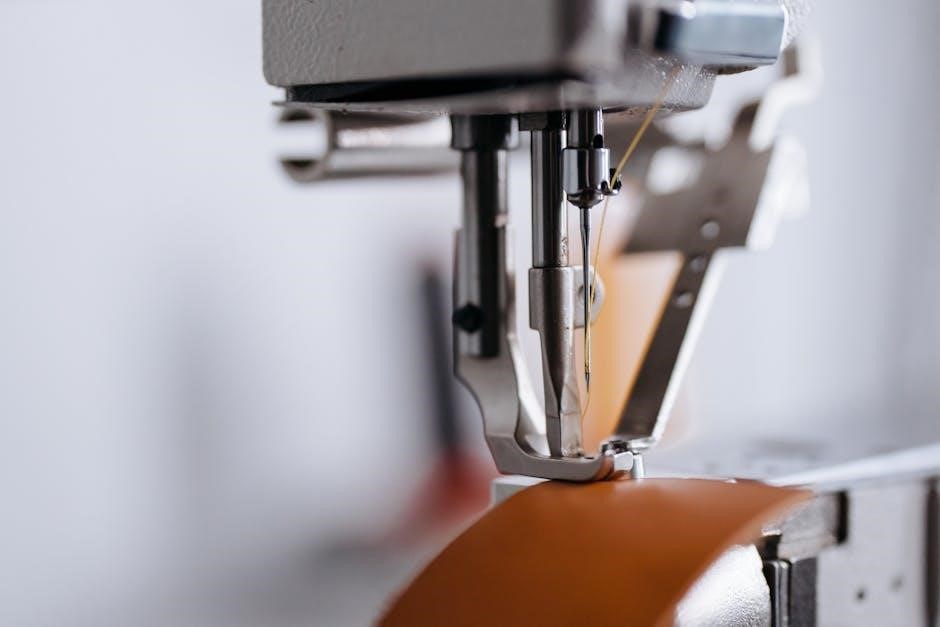
7.2 Using Special Presser Feet for Various Fabrics
The Euro Pro sewing machine comes with a range of special presser feet designed for specific fabrics and tasks, such as zipper, blind hem, and walking feet.
These attachments ensure optimal feeding and control, making it easier to sew through thick denim, slippery silk, or delicate fabrics. Using the right presser foot enhances stitching quality and versatility for diverse sewing projects.
How to Choose the Right Euro Pro Sewing Machine
With various Euro Pro models available, selecting the right one depends on your sewing needs, frequency of use, and fabric preferences. Consider features like stitch options, presser feet, and build quality to find the perfect match for your projects.
Assess your budget and required accessories to ensure the machine aligns with your goals, whether for home use, quilting, or heavy-duty sewing.
8.1 Factors to Consider for Different Sewing Needs
When selecting a Euro Pro sewing machine, consider your primary fabric types, stitching requirements, and frequency of use. Assess whether you need advanced features like automatic threading or specialized presser feet. Think about the projects you’ll undertake most often, such as quilting, embroidery, or heavy-duty sewing. Your budget and the machine’s build quality are also crucial factors to ensure long-term satisfaction and performance.
8.2 Popular Models and Their Specializations
Popular Euro Pro models include the 425WC, known for its versatility with denim and silk, and the 7500, offering advanced stitching options. The 7100 excels in precision sewing, while the 9125 is favored for heavy-duty projects. Each model caters to specific needs, ensuring optimal performance for quilting, embroidery, or everyday use, making Euro Pro a versatile choice for diverse sewing requirements.
Downloading and Accessing the Instruction Manual
Access Euro Pro sewing machine manuals online in PDF format. Visit official websites or dedicated databases to download specific models like 425WC, 7500, and more for free.
9.1 Finding the Correct Manual for Your Model
Identify your Euro Pro sewing machine model number to find the correct manual. Popular models like 425WC, 7500, and 9125 have specific guides available online. Visit official Euro-Pro websites or trusted databases to download PDF manuals. Ensure the manual matches your machine’s model for accurate instructions and troubleshooting. Verify the source for authenticity to avoid incorrect information.
9.2 Online Resources for Euro Pro Manuals
Access Euro Pro sewing machine manuals through trusted online platforms like ManualsLib, ManualsOnline, and SewingPartsOnline. These sites offer free PDF downloads for various models, ensuring you find the right guide for your machine. Visit ManualsLib or ManualsOnline to download manuals for models like 425WC or 7500. Always verify the source to ensure authenticity and accuracy.
Tips for Getting the Most Out of Your Euro Pro Sewing Machine
- Maximize efficiency with proper threading and tension adjustments.
- Explore creative projects using built-in stitch patterns and presser feet.
10.1 Maximizing Efficiency and Precision
To maximize efficiency, ensure proper threading and tension adjustments for smooth stitching. Regular maintenance, like cleaning and lubricating, keeps your machine running optimally. Use the correct presser feet for specific fabrics to improve accuracy and prevent fabric slippage. Always follow the manual’s guidelines for setup and operation to avoid common issues and achieve professional results. Experiment with stitch patterns to find the best settings for your projects.
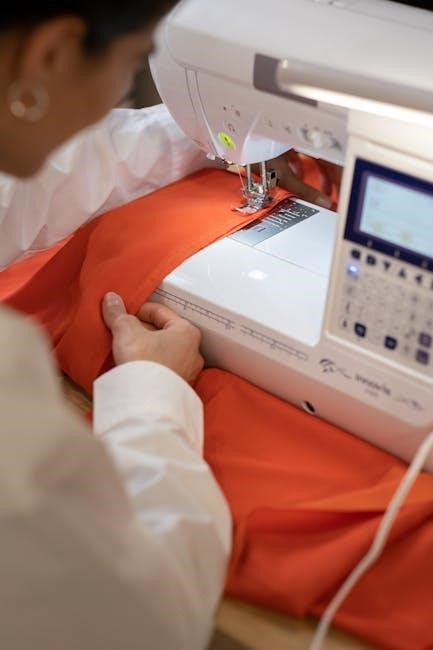
10.2 Exploring Creative Sewing Projects
Unleash your creativity with the Euro Pro sewing machine by tackling a variety of projects, from home decor to custom clothing. Experiment with built-in stitch patterns for unique designs. Try quilting, embroidery, or upcycling old fabrics into new creations. Use specialized presser feet for zippers, buttons, or decorative stitching. Practice on scrap fabric to refine techniques before working on final projects, ensuring precision and confidence in your sewing journey.
Mastering your Euro Pro sewing machine is now within reach. This manual has guided you through setup, threading, maintenance, and troubleshooting, ensuring confidence in your sewing skills. With practice, you’ll unlock endless creative possibilities, transforming fabric into beautiful, functional creations. Happy sewing!
11.1 Final Thoughts on Using the Euro Pro Sewing Machine
Your Euro Pro sewing machine is a versatile tool designed to bring creativity to life. With proper care and practice, it will serve as your trusted companion in crafting beautiful fabrics. Always refer to this manual for guidance and explore new projects with confidence. Happy sewing and enjoy the endless possibilities your machine offers!
11.2 Encouragement to Practice and Experiment
Practice is key to mastering your Euro Pro sewing machine. Experiment with different stitches, fabrics, and techniques to unlock its full potential. Don’t hesitate to try new projects—every stitch brings you closer to sewing excellence. Use this manual as your guide and embrace the joy of creating something truly unique with your machine.